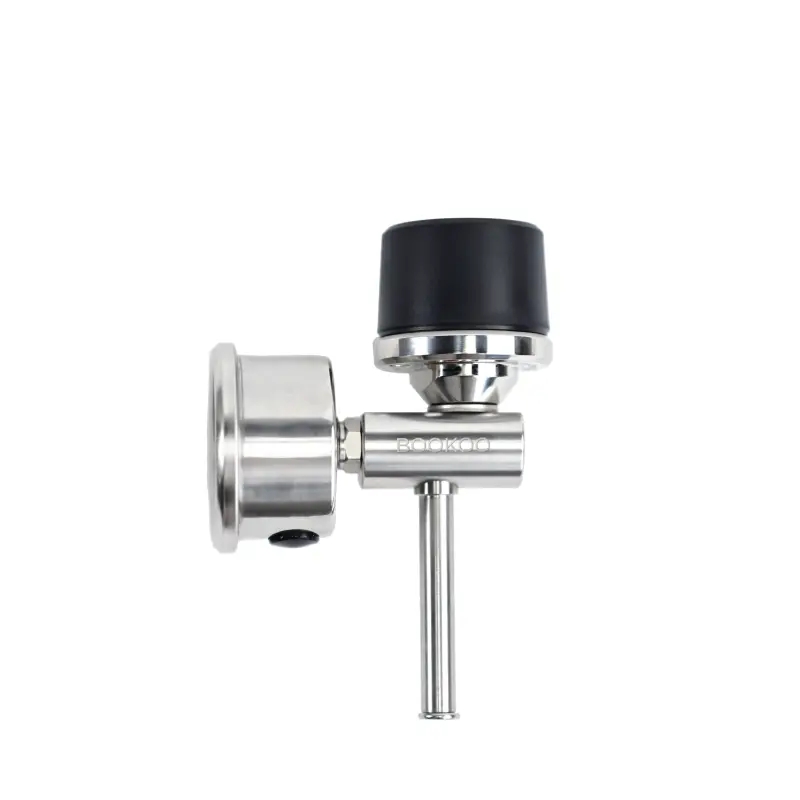
Tee Installation
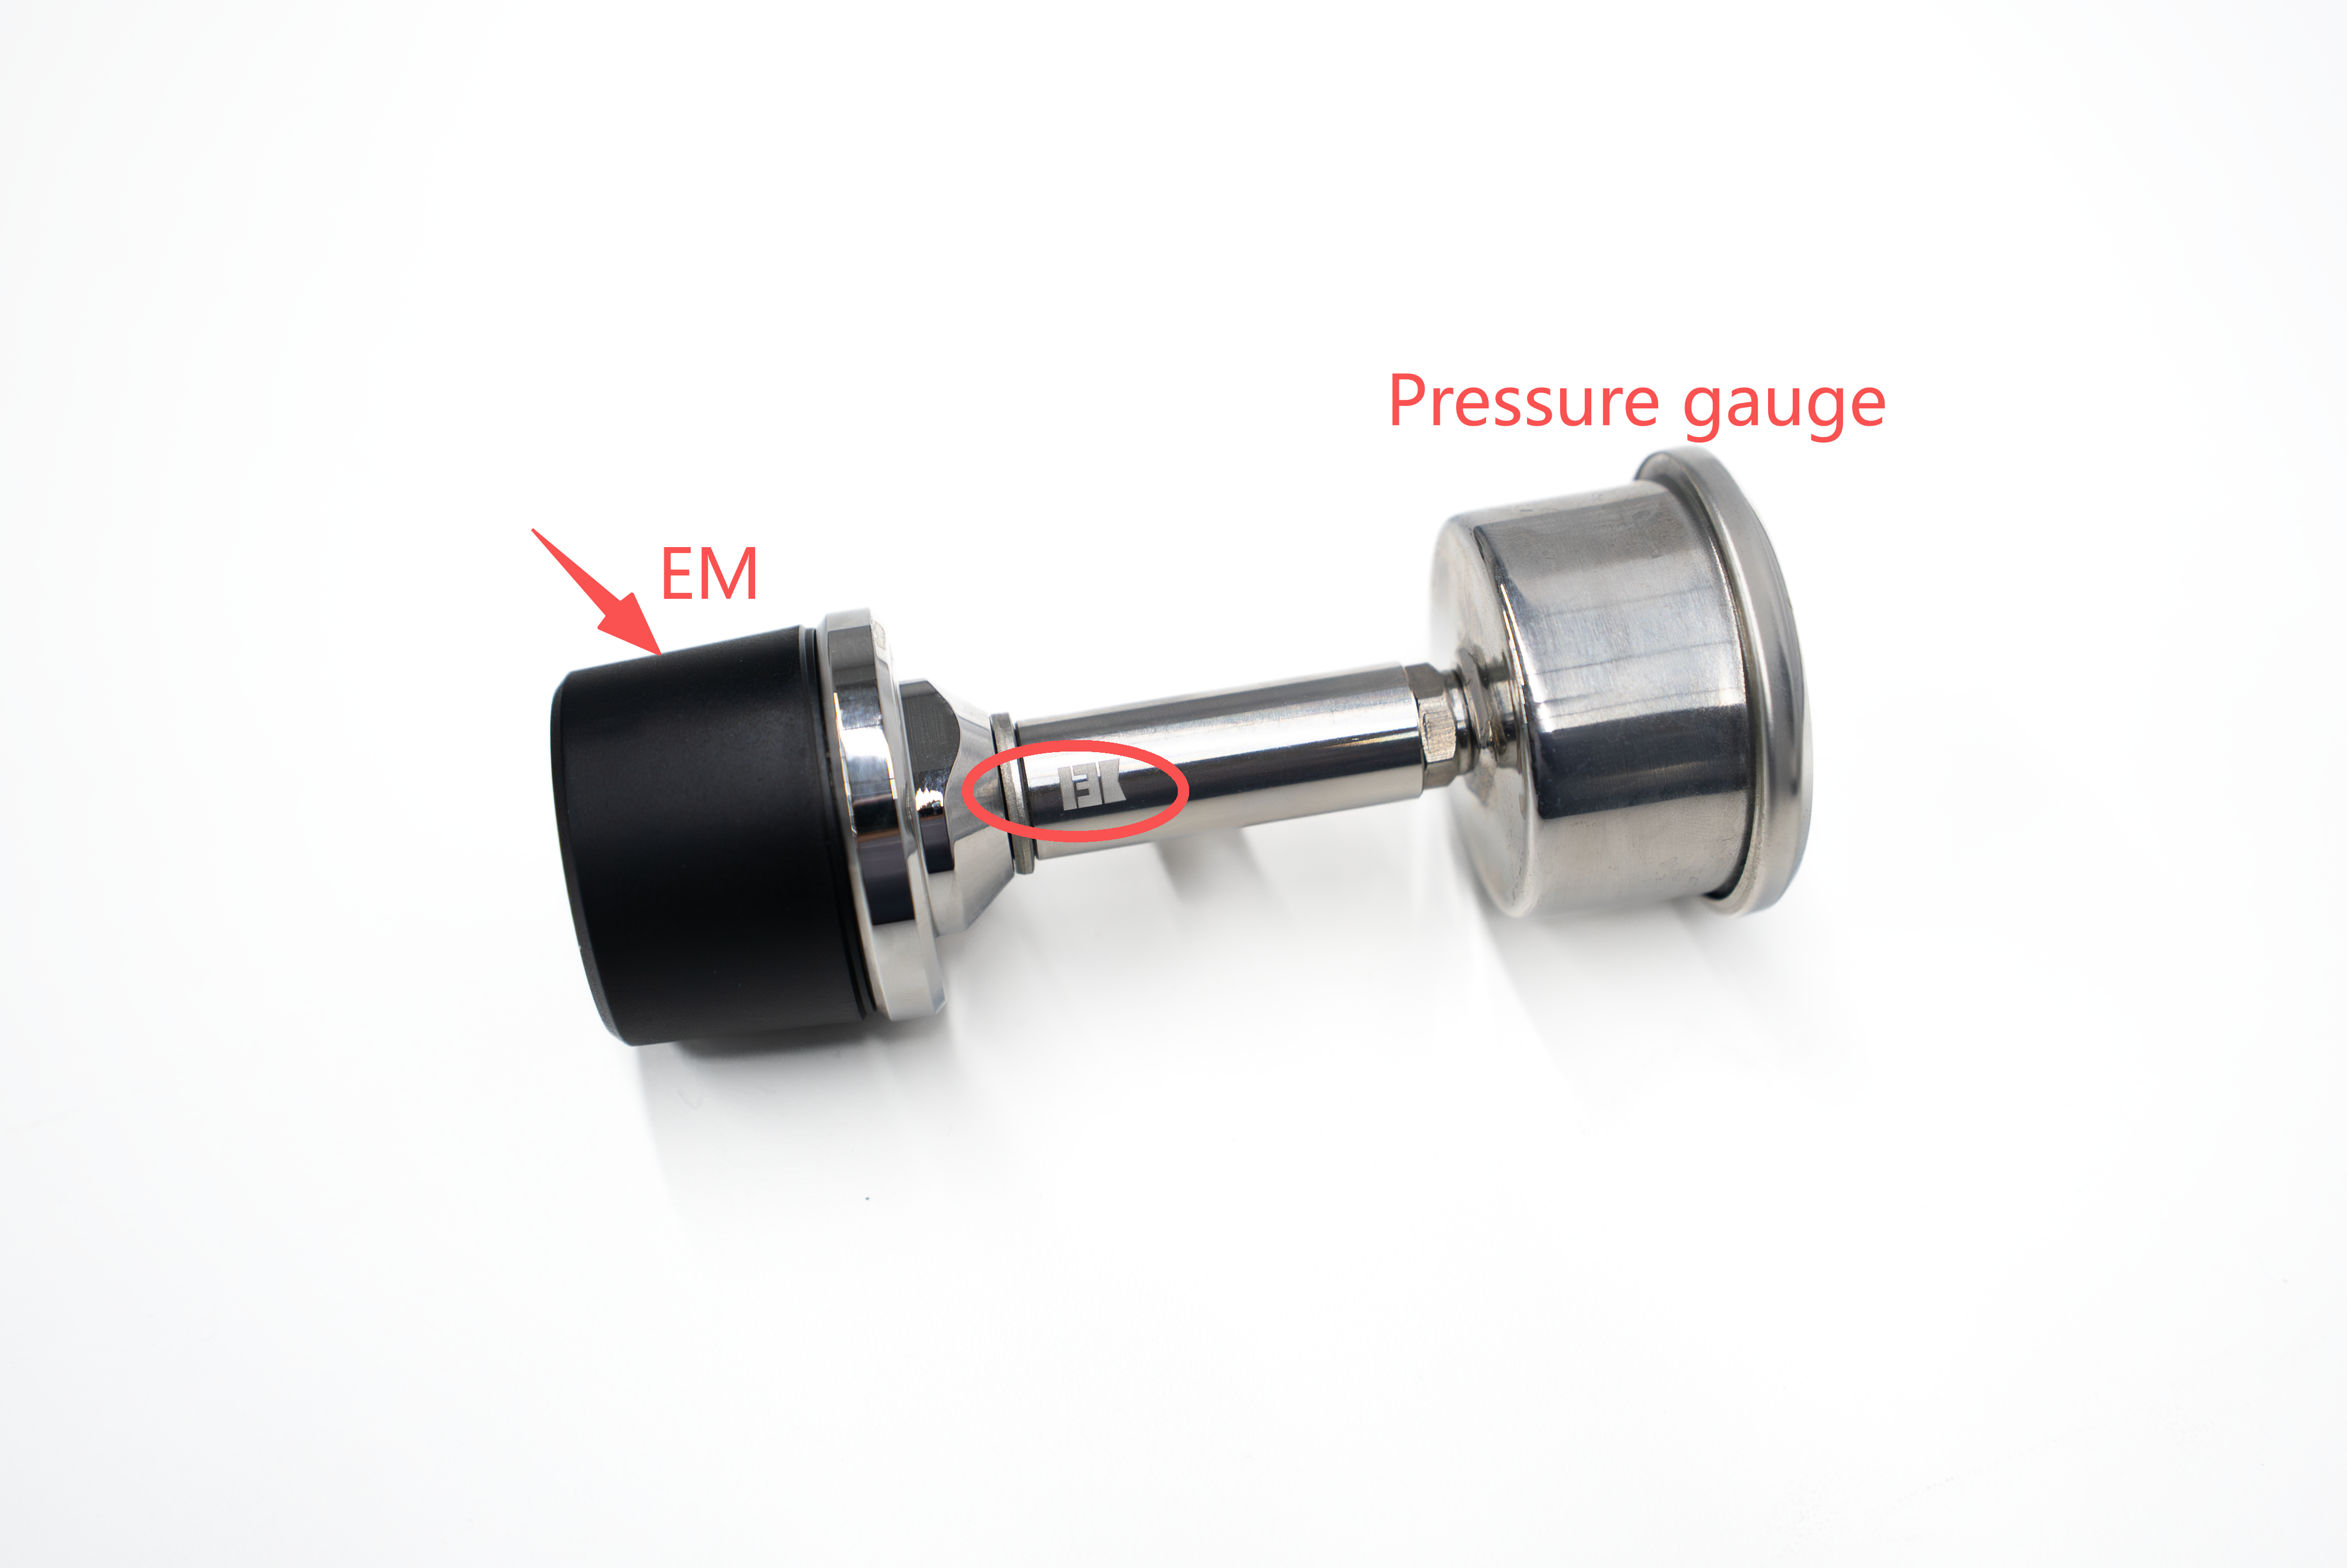
Our EM is usually installed on the short side of the Tee marked with BK.
Make sure the Tee is fully seated and the O-ring is properly positioned before tightening.
Function of the Red O-Rings
Red O-rings are installed on the ports of the T-splitter to:
Improve sealing integrity
Prevent water leakage during extraction
They are essential components and should not be removed during installation.
Installation Tutorials
If you are unsure about the installation process, refer to the following official tutorials:
EM installation for machines with E61 group head
https://www.youtube.com/watch?v=vjBnL3-GUnoE61 Tee + EM installation
https://youtu.be/T4zffKBftL0Flair 58 G1/8 Tee + EM installation
https://www.instagram.com/p/C__S5Jqzbmg/Cafelat Robot + EM installation
https://www.youtube.com/watch?v=Ym8norfmr0Q&t=14s
Product Compatibility Overview
Machine / Category | Compatible Product | Interface Standard |
|---|---|---|
E61 group head machines | 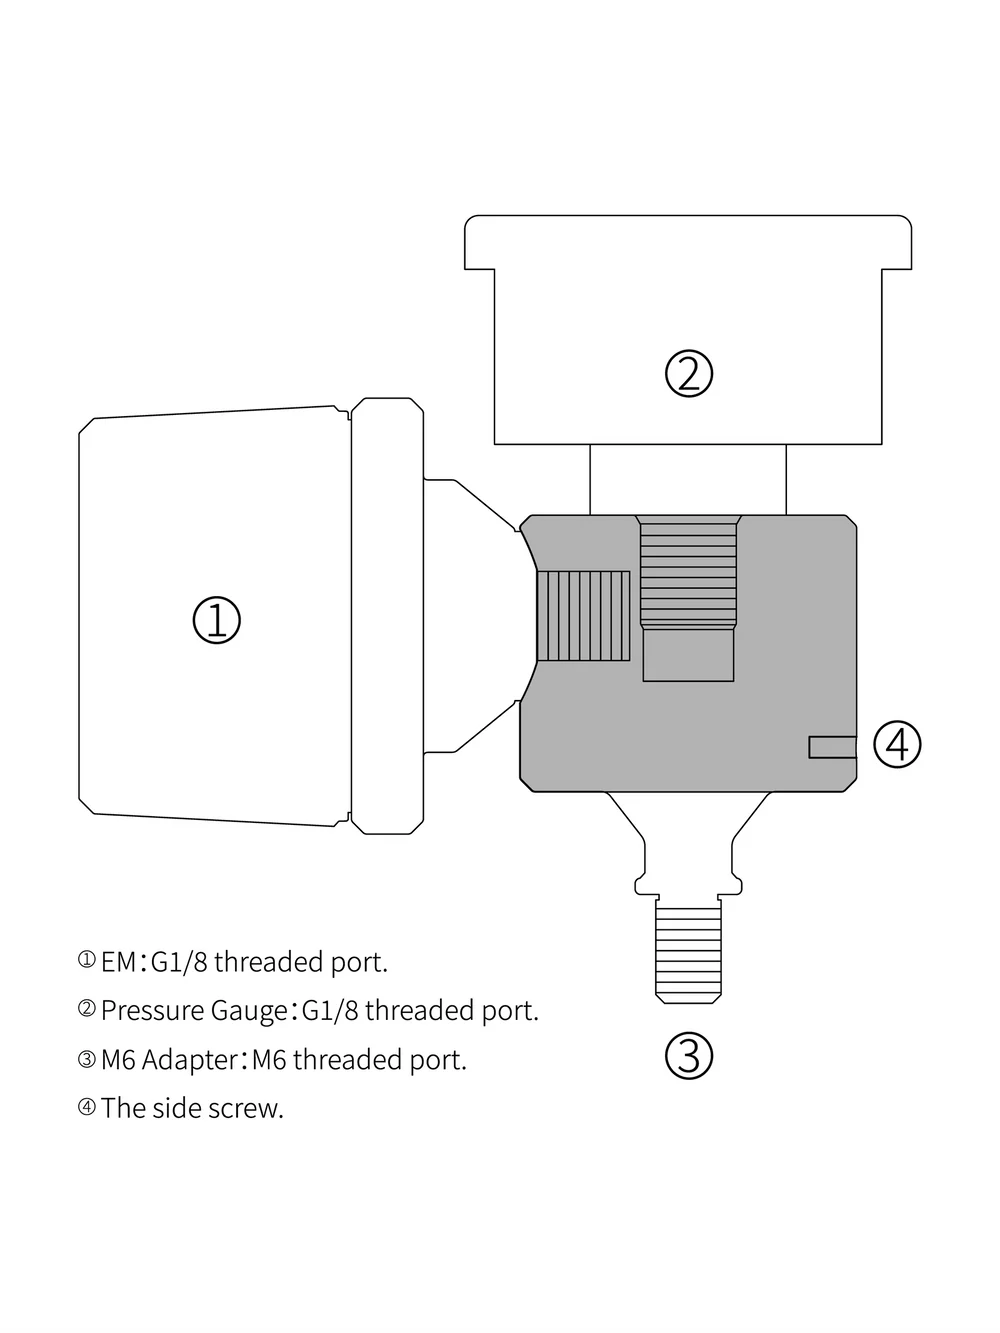 | |
Flair PRO 2 / PRO 3 | 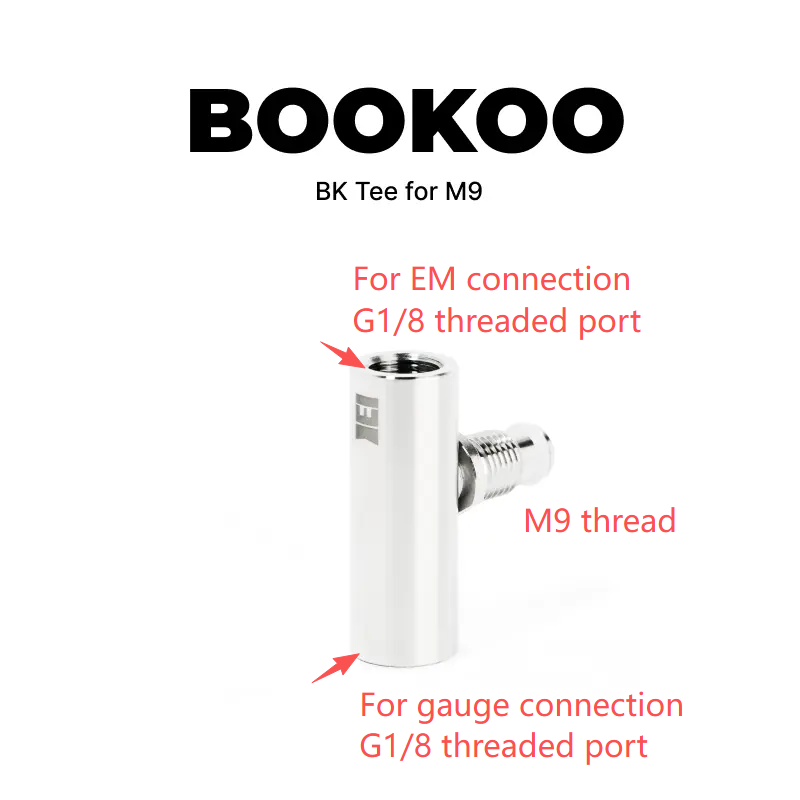 | |
Flair 58 / Flair 58 Plus 2 |  All interfaces are G1/8 threads. | |
Cafelat Robot |
Illustration of Pressure Gauge and EM Connection All interfaces are G1/8 threads. |
Notes
Thread Type is the key factor for compatibility, not machine brand or group head type.
E61 describes the group head type only; compatibility depends on the gauge and EM thread.
Non-standard or model-specific interfaces (e.g., Cafelat Robot) must use the original manufacturer’s parts for proper sealing.
For best results and leak prevention, always use the BOOKOO pressure gauge included in the Tee kit unless otherwise noted.
If you have any further questions or need additional help, please feel free to reach out to BOOKOO Support Team.
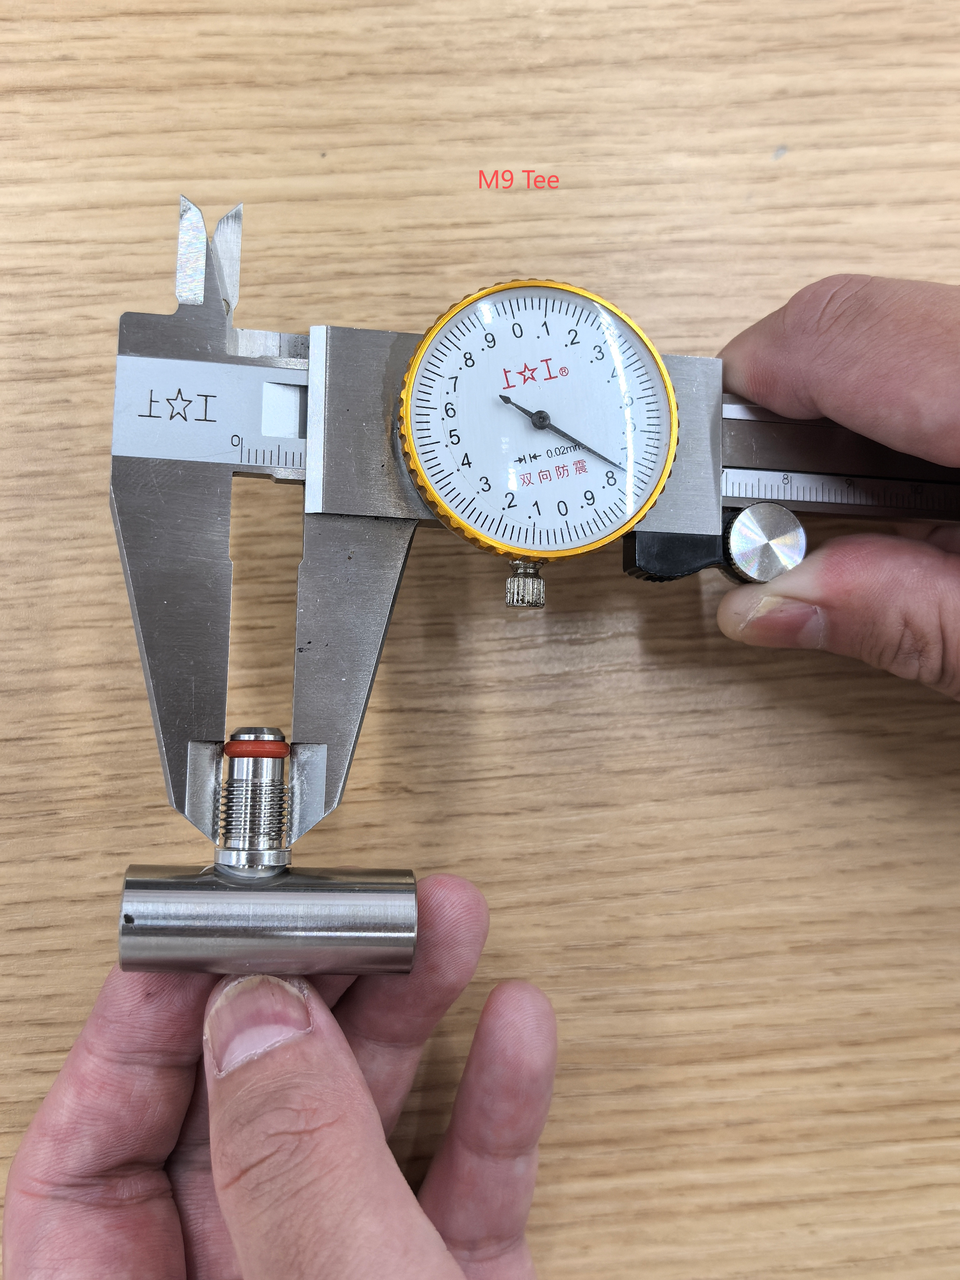
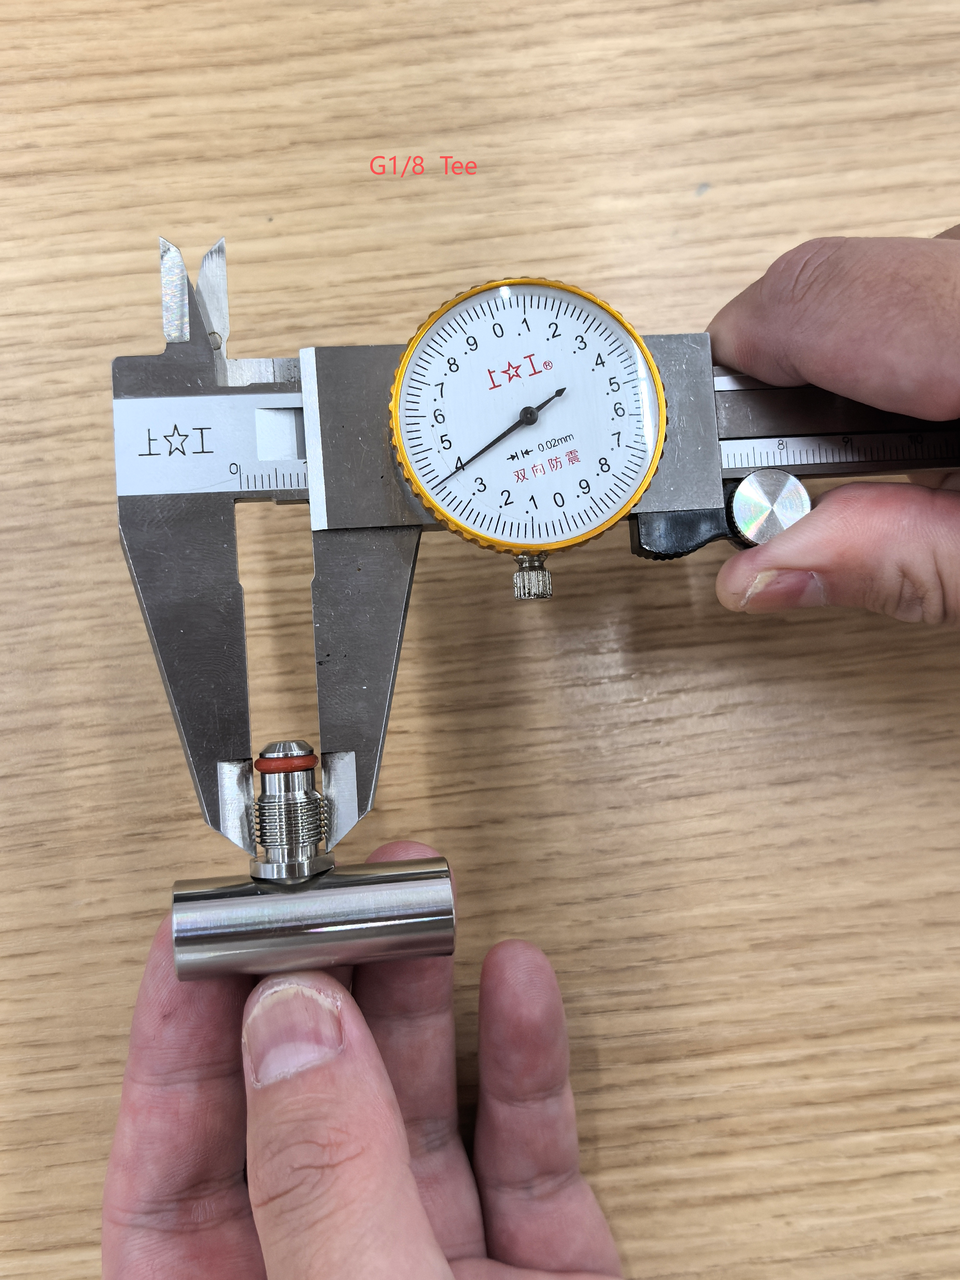
How to Tell the Difference Between an M9 Tee and a G1/8 Tee?
You can distinguish them visually by the thread size—the G1/8 thread is noticeably thicker than the M9 thread.
 |  |
|---|
If you have a vernier caliper, you can also measure the thread diameter for a more accurate identification.